Site-specific Application
In addition to this participation guide, please review the complete Odyssey user guides and FAQs to troubleshoot
any issues, or reach out to the Odyssey support team via the support chat box in the bottom right corner of the application.
Submit the site-specific application
1. Create Claim
- Click on Finance > Programs
- Select the DARES PBG for Interconnected Mini-Grid program to open it.
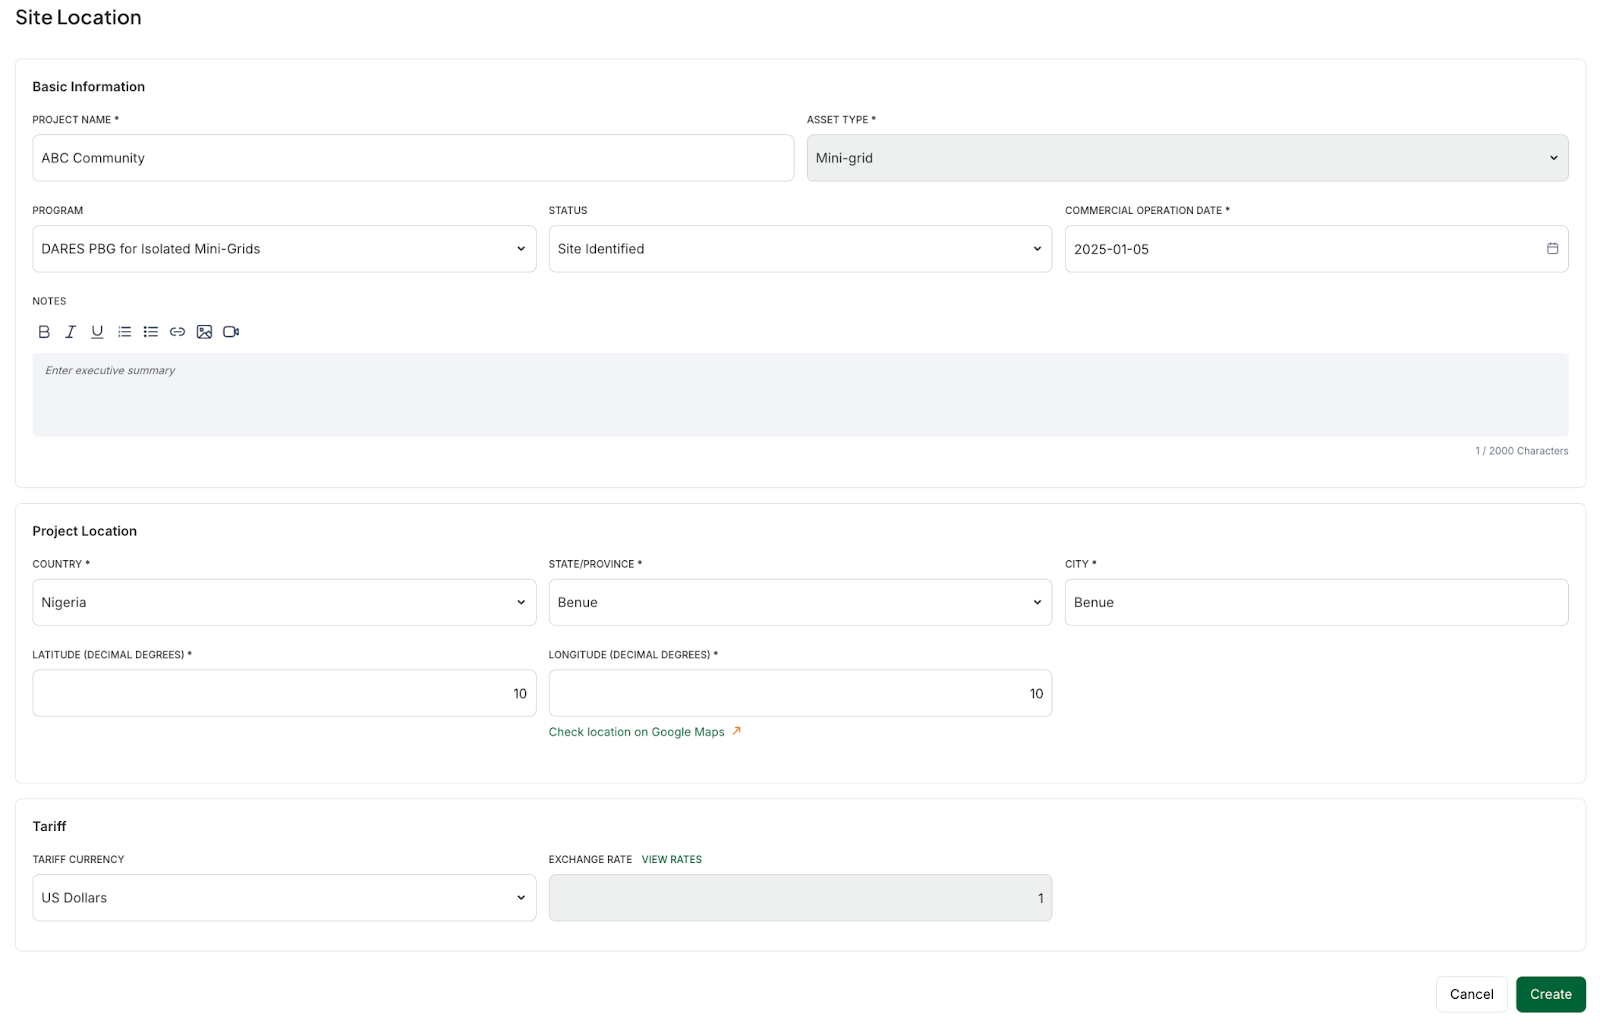
- Create a Mini-Grid Project.
- Complete the site location information.
2. Complete the project data modules
Detailed instructions for how to use each module can be followed in the pre-development user guides.
Information
You will also upload site-specific application files in the Project Files tab for each project. completing your site information.
Load
In the load module, you will provide information on the number and type of customers as well as the projected load profile. Learn more about creating a load assessment.
Generation Design
Distribution Design
The distribution system costs will be pulled into the Financials section and used to calculate project financial performance metrics. Learn more about tracking distribution design costs.
Costs
The Costs module is a place to track and categorize project capital and operating expenditures.
These will be pulled into the Financials module and used to calculate project financial performance metrics. Learn more about tracking costs.
Revenue
 Requirement
- The tariff proposed in the Odyssey financial model shall comply with NERC’s Mini-Grid AFUR Tool. You can download the AFUR tool here.
- You must set Tariffs in Naira
Financial
In the Financials module, you will enter project-level sensitivities and account for ramping/growth rates for your load assessment.
The financial page uses all the information you entered into Odyssey to calculate key financial metrics. Learn more about calculating project financials.
- Ensure that the expected lifespan of your project is 20 years.
- The baseline year should be Year 2.
3. Upload Site-Specific Project application documen
You are required to upload all site-specific documents in the Project Application tab.
Go to the Documents Upload section in the application form.
Drag and drop your files into the upload area, or click Browse to select files from your device.
Ensure you upload all required supporting documents in this section to successfully submit your application.
To upload additional files not listed in the Documents Upload section:
Click on the Files tab.
Upload your additional documents by clicking Upload Files and selecting the files you wish to add.
4. Submit your Application
Ensure all project data modules and required document uploads in the Project Application module are completed before submission.
To submit your project:
Navigate to the Project Submission module.
Click the Submit Project to Program button.
Verify that all required documents in the Project Application tab are uploaded, as incomplete uploads will prevent submission.
Check Your Application Status
Below is a description of the project application statuses set by the program managers. You can use this information to track the status of your application:
Under Review
Your application is currently being reviewed by the program managers.Incomplete
Your site-specific application is incomplete and requires additional information. Your project has been reopened for editing.Once you add the required information, you must message REA to inform them you have made the necessary updates. You also need to resubmit the project from the ' Project Submission' page.Approved/Grant Agreement Under Review
Your application has been reviewed and accepted. The grant agreement is currently under review.Grant Agreement Signature
The grant agreement for your project has been signed.Commissioned
The project has been commissioned and is in progress.Declined
Your application has not been approved for the program.Cancelled
The project has been cancelled
5. Milestones Reporting
- Within each project, select the Milestones tab from the top navigation bar.
- To update a milestone, click on Status to make changes.
- You can also select the milestone to update its status, add notes, and attach files.
Additional Milestones
- Click on the + Add Milestones sign in the Additional Milestones section
- Input the milestone that you want to report on and a description of it and then click on Add Milestone to create it
- Select the newly created milestone from the list below
- Click on Edit Milestone to provide a status and any required details
- Click on Confirm to save it.
Milestone Status Definition
Financing Secured
Once you have secured financing needed to begin purchasing materials for and constructing your site, set the status of your project to "Financing Secured" to update the program administrators (REA) on your project progress.Purchase Order Assets
Once you have placed an order for the purchase of materials for the site, set the status of your project to "Purchase Order Assets" to update the program administrators on your project progress.All Goods Received (Cleared Customs)
Once you have received the materials and cleared them.Installation (All Goods on Site)
Once all materials required for construction are at the site and you are able to begin the installation of the mini-grid components., set the status of your project to "Installation (All Goods on Site)" to update the program administrators on your project progress.Under Construction
Once you have begun construction on your project, set the status of your project to "Under Construction" to update the program administrators on your project progress.Commissioned
Once you have submitted proofs of customer connection for grant disbursement in the Connections section of Odyssey, set the status to "Commissioned" to update the administrators on your project progress. The Odyssey team can work with you at this point to integrate your meter consumption data to support remote verification of the site. Learn more here.
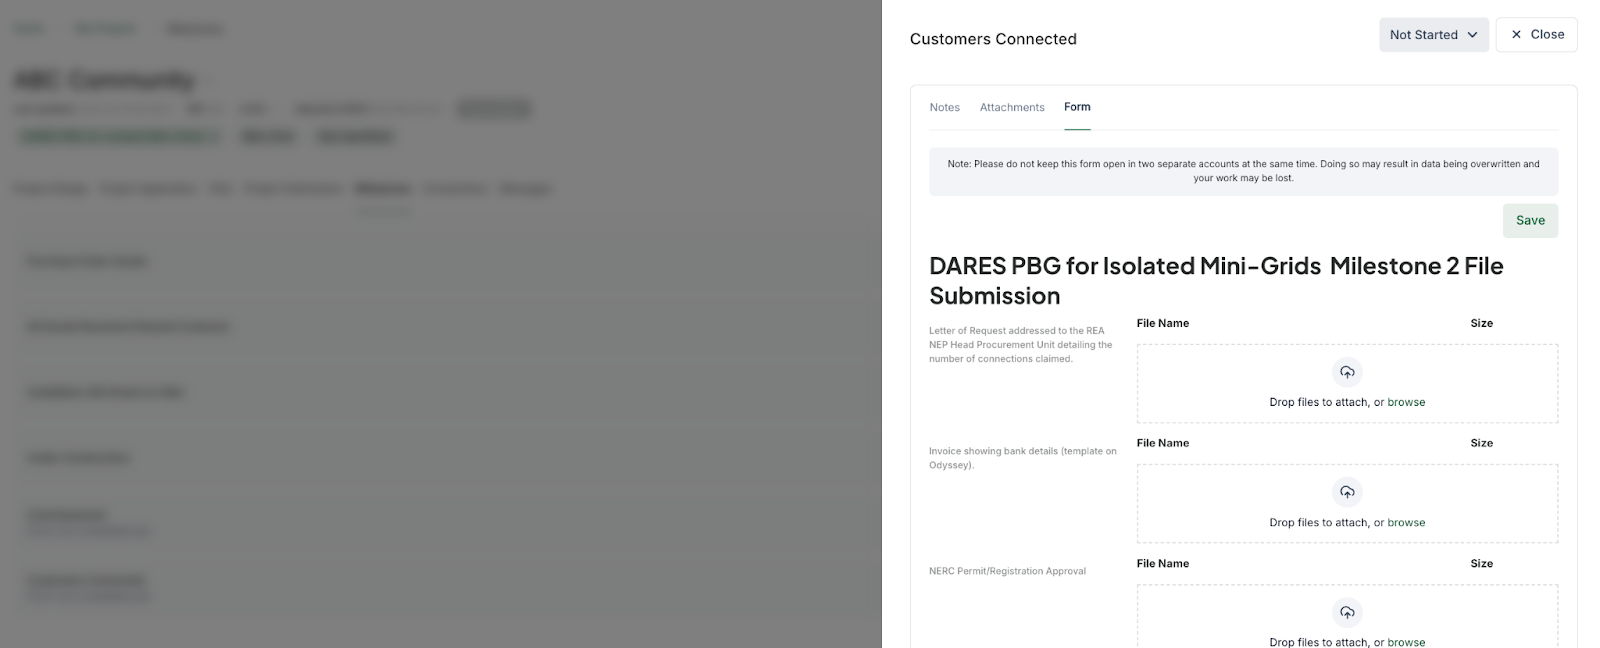
Customers Connected
Once customers have begun using power at the site, set the status of your project to "Customers Connected" to update the program administrators on your project progress.
6. Project Deployment
Milestone 1 - Disbursement at Commissioning & Grid Connection
Eligibility Criteria:
- Successful installation and commissioning of the distributed energy resources (DER) asset.
- Physical connection of the mini-grid to the distribution company’s (DisCo) network.
- At least 80% of the approved total capacity (in kW or MW) must be commissioned and connected.
Grant Amount Unlocked:
Developers can access 60% of the total approved grant amount upon meeting these criteria.
Additional Conditions:
The grant amount will be ring-fenced for 12 months from the signing of the grant contract.
Developers must document:
- Commissioning certificate from the project engineer.
- Evidence of grid interconnection (e.g., DisCo connection approval letter).
- Total commissioned capacity (kW/MW) and proof of synchronization with the DisCo network.
Milestone 2: Performance & Supply Quality Verification
Eligibility Criteria:
- Achievement of average daily minimum hours of supply from the plant over a 6-month period within one year after commissioning.
- The minimum hours of supply will be defined in your grant agreement (e.g., 16 hours per day).
- Demonstrated compliance with technical performance standards (e.g., voltage stability, frequency control).
Grant Amount Unlocked:
- Developers can access the remaining 20% of the total grant amount upon meeting the above requirements.
Total Grant Disbursed (if all conditions met):
|
7. Submit Connections for Verification
1. Integrate Meter Data
For remote verification of connections, Odyssey automatically checks your meter and payment data integrated with Odyssey to verify that your connections have been supplied with electricity and meet program requirements. Learn more about setting up a data integration.

Once your site has been commissioned, please complete your meter integration as soon as possible so your data will be available when you are ready to complete remote verification.
Note: When creating the Integration on Odyssey, please ensure the Level of integration is Project level and the Data Set is Meter Metrics. Reach out to the Odyssey support team incase of any questions.
2. Complete remote verification and submit your connections
You will upload connections and complete remote verification in the Connections module of each project. Learn more about completing remote verification and submitting your connections.
To verify your connections;
Select the checkbox next to each connection you would like to submit
Select Verify
View your connections status
Once you select 'Verify', the verification process will be initiated and the status of each of them will be displayed. Review the meaning of each status below:
Verification in progress
The request to verify the connection has been sent.Meter Reading not found
No data was found for the meter. Please check your integration againData out of date range
Consumption was found, but not within the date range of the rule (e.g. Consumption is greater than zero but doesn't meet the 90-day date range)Didn’t meet requirements
Consumption is equal to 0Error during verification
An unexpected error occurred.Verified
Verification was successful
3. View your connections status
Once you have submitted connections, the program administrators will review your connections and either mark the connections as Approved, Paid, or Rejected. You can view a summary of the status of all connections in the summary at the top of the Connections module and will be notified by email of any connection status updates.
Not Submitted
Connections are uploaded to Odyssey but not submitted.
Submitted Connections
Investor has received the connections.
Approved Connections
Investor has approved the connection.
Paid Connection
Investor has given the connection a tier, assigned a payout, and paid for the connection.
Rejected Connections
The investor received the connection and there was a reason the connection was refused.
You can rectify the connection (ex: adding missing information) and submit again if appropriate. Please check the Messages section of your project for more information from the program administrator.
8. Messaging program administrators
You can communicate with the Program administrators
Navigate to the Messages module in your project.
Write your message
Click on Submit to send it.
Related Articles
Site-specific Application
The DARES PBG for Isolated Mini-Grid program uses the DARES Platform powered by Odyssey exclusively for all tender-related activities. Submissions outside of the platform will not be accepted. In addition to this participation guide, please review ...Site-specific Application
The REA Nigeria Electrification Project (NEP) Performance-Based Grant (PBG) uses the Odyssey platform exclusively for all tender-related activities. Submissions outside of the platform will not be accepted. Please read this guide thoroughly for ...UEF SOGREA Site - Specific Application
Once your Pre-Qualification Application has been Selected, you may submit applications for individual projects (e.g. specific mini-grid sites) on a rolling basis. Download and review the Site-Specific Project Application Documents Navigate to the ...Submit the Site-Specific Technical Application
Once you have been accepted into the program, you may submit projects to be verified on a rolling basis. 1. Verify that you have completed the required project data modules Once you have completed the required data modules in the Site-specific ...Application Instructions
The REA Nigeria Electrification Project (NEP) Performance-Based Grant (PBG) uses the Odyssey platform exclusively for all tender-related activities. Submissions outside of the platform will not be accepted. Please read this guide thoroughly for ...