DARES SAS Claim Submission
The DARES SAS Performance Based Grant (Supply Side) program uses the DARES Platform powered by Odyssey exclusively. Please read the guide thoroughly for instructions on how to submit your monthly claims to the DARES program.
In addition to this participation guide, please review the complete Odyssey user guides and FAQs to troubleshoot
any issues, or reach out to the Odyssey support team via the support chat box in the bottom right corner of the application.
1. Create Claim
- Click on Finance > Programs
. - Select the DARES SAS Performance Based Grant (Supply Side) program to open it.
- Click on Claims from the top navigation bar and create a Solar Home System claim.
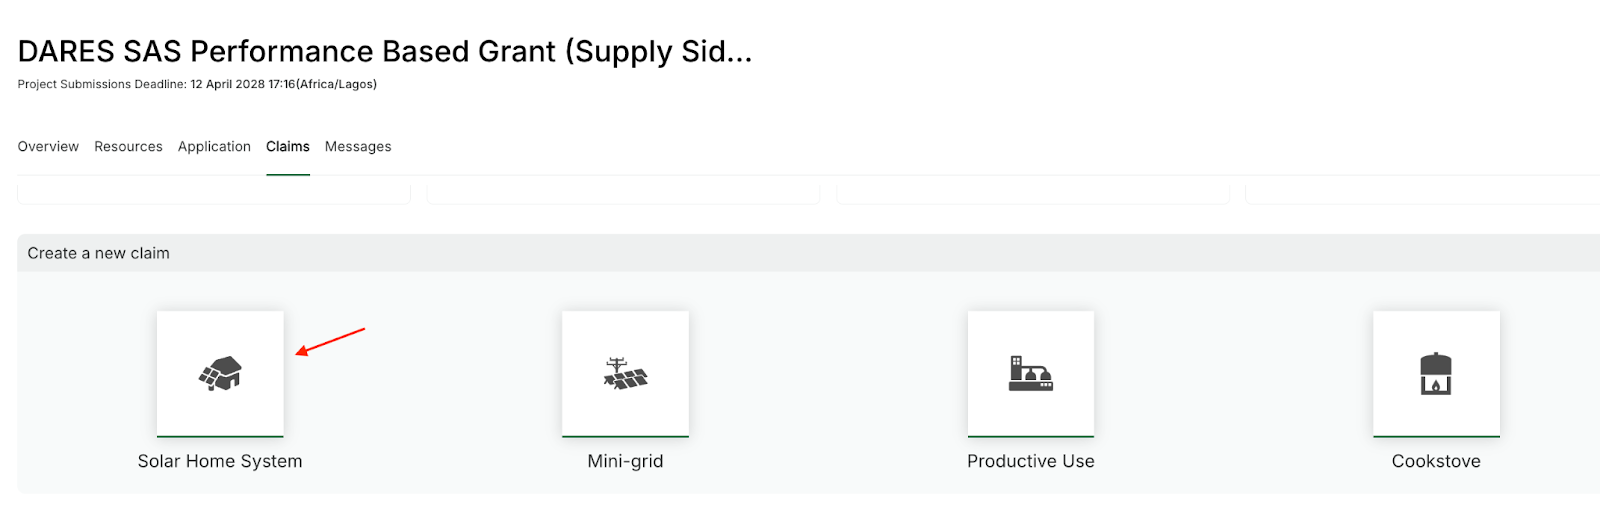
- You must create a new claim each month to submit the new connections for that month. This will be done before the 14th of each month. Claims submitted after the 14th will be processed in the following batch/month.
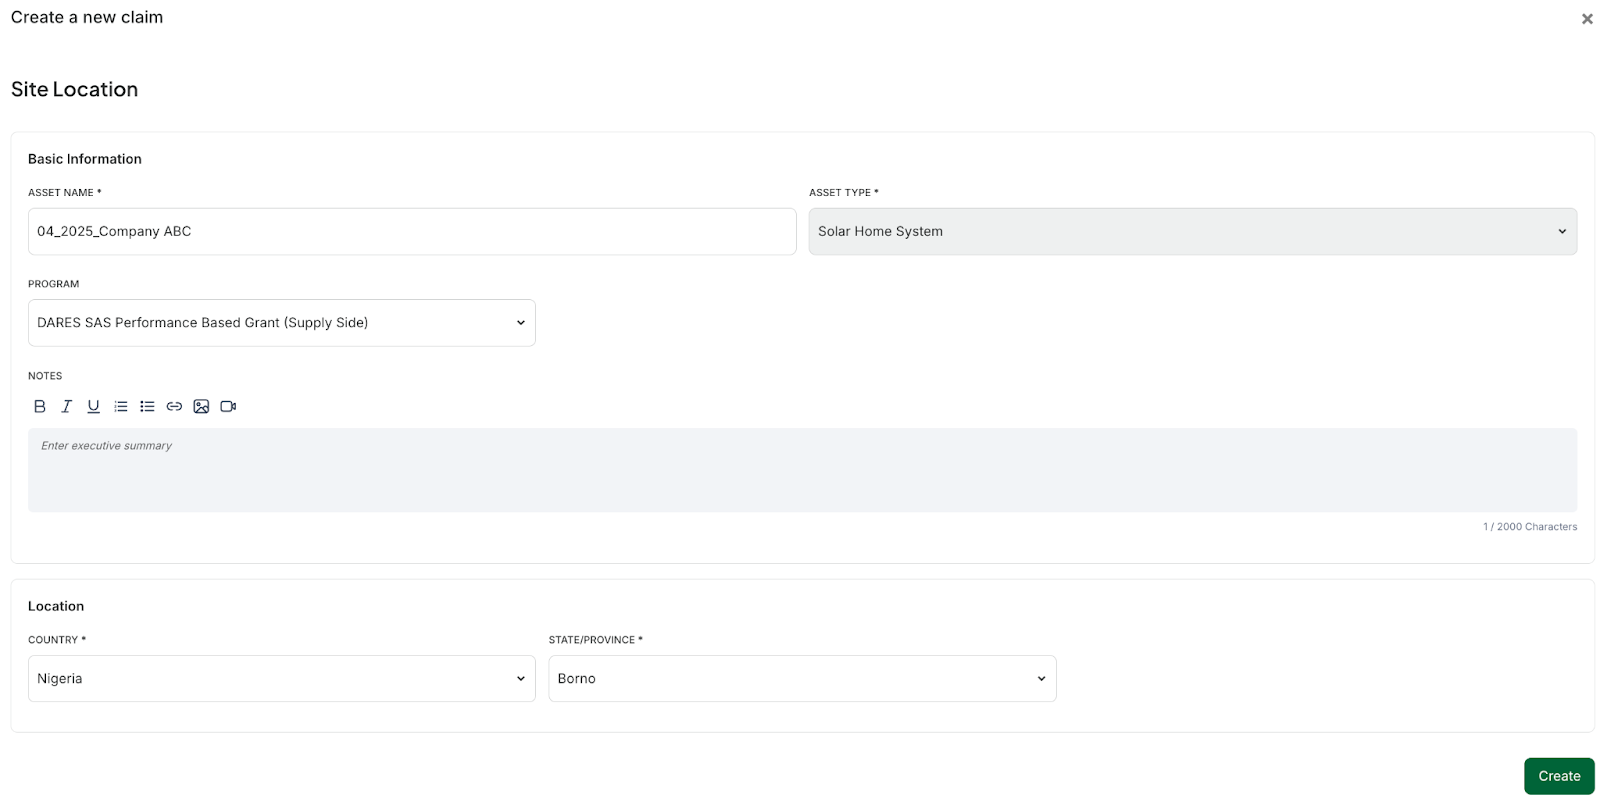
- You must label each claim by the month it is submitted, using the format Month_Year_Company Name (e.g., "04_2025_Company ABC" for April 2025).
- Each sales month must have a separate claim. For example, if your company submits a claim in December but has sales data for both October and November, you need to create two separate claims: one labeled "10_2025_Company Name" for October 2025 and another labeled "11_2025_Company Name" for November 2025.
- Once a claim is submitted, no further updates or connection uploads will be allowed. Review carefully before submitting.Complete the claim information
- Asset Name: Enter the month that your claim will be submitted using the Month_Year format
- Notes: Not required, but you may enter claim information here
- Country: Select "Nigeria" from the dropdown menu
- State: Select the city of your headquarters or distribution center (this field is not essential but must be
filled out to proceed).- Program: you must add the project to the corresponding program in the Programs field in order to
submit your claims. You will not be able to complete your proposal if the project is not registered with the program.
- Save your claim
2. Populate Connections Template
- Download Template Connections
- Navigate to the Connections module of the claim.
- Select the Download Template button to download an Excel template where you can import your proof of customer connections (e.g., newly installed systems). A description of the data you should include in each column is outlined below:
3. Upload Connections Template
- Select the Import/Update Connections
button.- Upload the completed Excel template.
- Make any necessary edits directly in the software by clicking on a connection, or download the connections, make changes, and re-upload.
- Run a check for duplicates before submitting. This ensures you’re not submitting a connection that has already been submitted. If you don’t check for duplicates, the Submit button will be greyed out and unclickable.
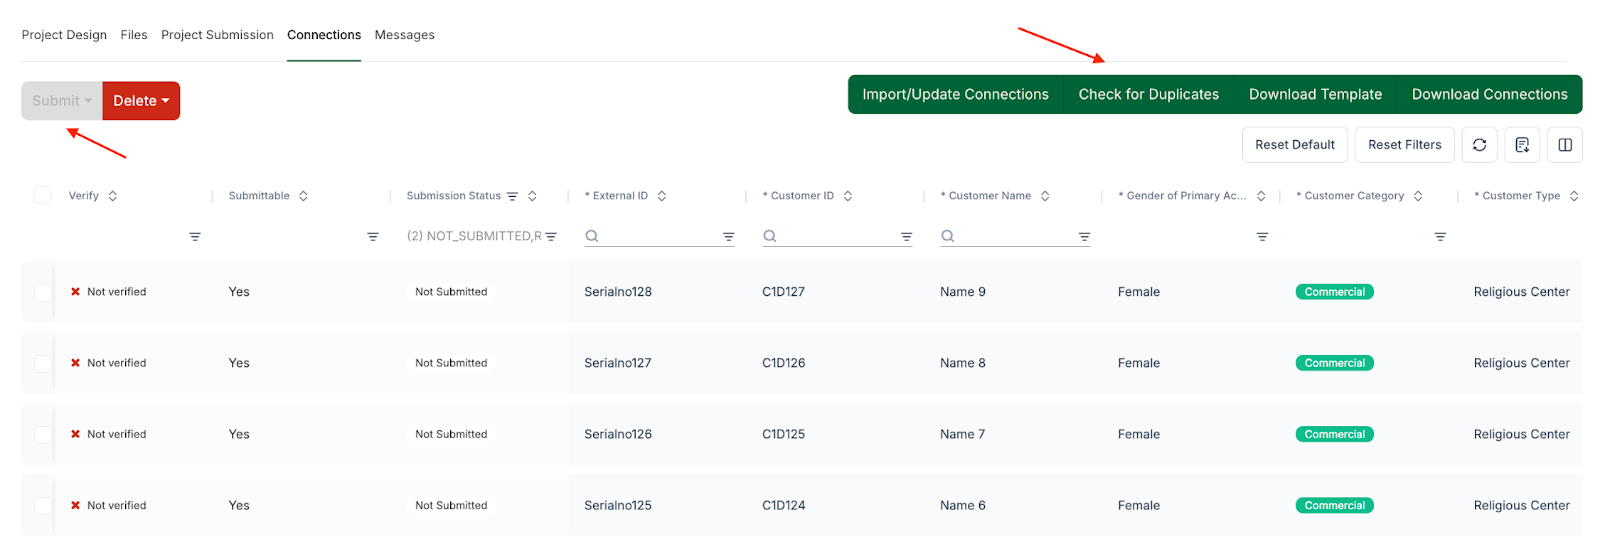
- Check the Submittable column to ensure that the required information has been provided and there are no duplicate connections:
- If the Submittable column says "Yes," you have provided the required information and can submit your connections.
- If the Submittable column is red and says "No," either data is missing or the connection has already been submitted. Filter by "No" to see which connections need additional information. Missing rows will be highlighted in pink.
4. Verify your Connections
- Payment Amount: The payment must be greater than 0.
- Payment: At least a single payment must be found on the CRM .
- Geolocation Verification: Longitude and latitude must match the correct LGA. If they don’t, verification fails.
- Select the checkbox next to each connection you would like to submit. To select all connections at once, use the checkbox beside the "Verify" column.
- Select Verify
- Once you select Verify, the verification process will be initiated and the status of each connection will be displayed. Review the meaning of each status below:
- Verification in progress: The request to verify the connection has been sent. Please wait a few minutes to see the results of the verification.
- Payment not found: A payment could not be found for the external ID of the connection.
- Data out of date range: Payment was found, but not within the date range of the rule. The payment date on your monthly claim has to be close in range to the payment date from your CRM data.
- Didn't meet requirements: Payment is equal to/less than zero (0). Payment from CRM data has to be greater than zero to be verified.
- Error during verification: An unexpected error occurred. Please reach out to our support team for assistance via the chat in the lower right corner or via support@odysseyenergysolutions.com
- Location mismatch: The provided coordinates do not match the LGA.
- Verified: Verification was successful.
Note: You can access the Remote Verification Dashboard in your account by navigating to Home > Analytics to investigate failed connections. If the dashboard is not available in your account, please reach out to the Odyssey support team to request it be added.
5. Submit your Connections
- Select the checkbox next to the Verify field to select all connections.
- Select the Submit button
- Choose Submit Selected Connections or Submit All (Filtered) Connections from the dropdown menu
- Verify that all connections were submitted in the summary panel at the top of the page
- Filter the Submission Status to "Not Submitted" to see connections that were not submitted
- Verify that your connections are complete (see above) and resubmit
6. Installment Payments Tracking and Verification
- After the initial verification, an additional check will be conducted.
- Eligibility for an incentive requires that the end user makes three additional payments beyond the initial payment.
7. Messaging program administrators
Navigate to the Messages module in your claim.
Write your message
Click on Submit
Related Articles
DARES SAS Performance Based Grant (Supply Side)
The DARES SAS Performance Based Grant (Supply Side) program uses the DARES Platform powered by Odyssey exclusively. Submissions outside of the platform will not be accepted. Please read the guide thoroughly for instructions on how to submit an ...Claim Submission
The NEP Solar Home Systems OBF program uses the NEP Platform powered by Odyssey exclusively. Please read the guide thoroughly for instructions on how to submit your monthly claims to the NEP program. In addition to this participation guide, please ...Endline Survey Submission
Navigate to the Finance section in your account Select Gender-Focused RBF for PUE Appliances - Pilot from your programs list Navigate to the Claims section Open your first previously submitted claim Select the Download Connections button to download ...DARES - NEP Legacy Projects
The REA Nigeria Electrification Project - DARES - NEP Legacy Projects uses the Odyssey platform exclusively for all tender-related activities. Submissions outside of the platform will not be accepted. In addition to this participation guide, please ...DARES Solar for Business
The DARES Performance-Based Grants for Solar Business Systems program uses the DARES Platform powered by Odyssey exclusively. Submissions outside of the platform will not be accepted. Please read the guide thoroughly for instructions on how to submit ...